Turret MiniGame
Welcome to the Turret Minigame!
In this Tutorial, we will build a turret rotates and shoots targets around it. The Assets are available on the server and a link will be provided here if you want to download them.
Parts of the code will be displayed and explained under each. C# scripts will also be available in order to compare how things change when coding on Graal3D.
Without further ado let's get into it.
TurretMiniGame GameObjects
All the prefabs are under the asset bundle: minigame (you can view them in the bundle explorer "F10")
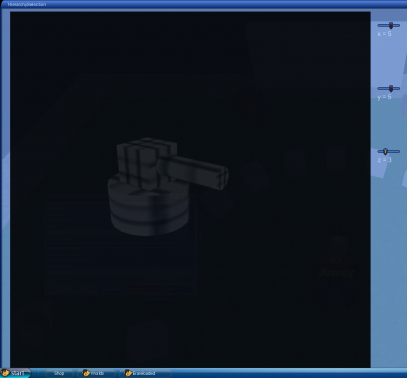
Turret that shoots the projectiles:
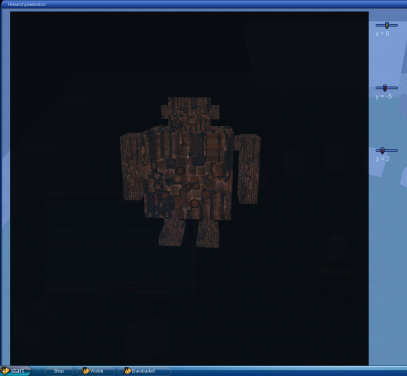
Robot that will serve as a target:
Cubes Instantiated in different position also for targets:
findplayer("GraalID").addweapon(this.name);

//#CLIENTSIDE
function onPlayerChats() {
  if (player.chat == "start") {
    destroy();
    start();
  }
  if (player.chat == "dest") destroy();
}
The way I start the minigame is onPlayerChats; when the player says "start". We'll also see how to destroy the GameObjects when the player says "dest".
function start() {
  this.start = true;
  //PLAYERMOVEMENT.Freeze();

  //for turret control
  this.rotateangle = 0; //Rotation angle of the turret
  this.rotateangleB = 270; //Rotation angle of the barrel
  this.speed = 15;

  this.currentX = player.x;
  this.currentY = player.y;
  this.currentZ = player.z;
  echo ("TurretMiniGame warp from=" @ this.currentLevel @ " x=" @ this.currentX @ " y=" @ this.currentY @ " z=" @ this.currentZ);
  WARPMANAGER.Warp(19, 14 ,0.7 ,"only_ground.nw");
  sleep(1.5);

  Quattro::AssetManagement::LoadAssetBundle("minigame"); //loading the assetbundle
}
this.start = true; will be used to indicate that the game has started.
New: Using PLAYERMOVEMENT and WARPMANAGER
PLAYERMOVEMENT.Freeze() is a method that freezes the player (weapon: Julienm20/PlayerMovement) WARPMANAGER.Warp(x,y,z,level) (weapon: Player/WarpManager)
Having uploaded the Asset bundle called "minigame" that contains the prefabs to the server, I start off by loading them, creating the prefabs, instantiating them and giving them a position in the start function (Uploading and Loading AssetBundles for info on how to upload assets).
function onAssetBundleDownloaded(bundlename) {
  if (bundlename == "minigame") {
    SetTimer(9999);
    this.empty = GameObject::Create("empty"); // for parenting and deleting

    this.turret = GameObject::createfromassetbundle("minigame", "assets/jimmyminigame/turret.prefab");
    this.robot1 = GameObject::createfromassetbundle("minigame", "assets/jimmyminigame/robot.prefab");
    this.robot2 = GameObject::createfromassetbundle("minigame", "assets/jimmyminigame/robot.prefab");
    this.wreckedrobotprefab = GameObject::createfromassetbundle("minigame", "assets/jimmyminigame/robot wrecked.prefab");
    this.projectileprefab = GameObject::createfromassetbundle("minigame", "assets/jimmyminigame/projectile.prefab");
    this.explosion = GameObject::createfromassetbundle("minigame", "assets/jimmyminigame/explosion.prefab");

    this.turret = Object::Instantiate(Type::GameObject, this.turret);
    this.robot1 = Object::Instantiate(Type::GameObject, this.robot1);
    this.robot2 = Object::Instantiate(Type::GameObject, this.robot2);

    this.turret.transform.position = Vector3::Create(player.x, player.z, player.y);
    this.robot1.transform.position = Vector3::Create(player.x - 5, player.z - 1, player.y + 10);
    this.robot2.transform.position = Vector3::Create(player.x + 5, player.z - 1, player.y + 10);

    this.turret.transform.localscale = Vector3::Create(1,1,1);
    this.robot1.transform.localscale = Vector3::Create(1,1,1);
    this.robot2.transform.localscale = Vector3::Create(1,1,1);

    loadCubes();

    player.charactercontroller.enabled = false;
    player.gameobject.transform.position = Vector3::Create(player.x, player.z+5, player.y);

    this.launcher = GameObject::Find("Launcher");
    this.barrel = GameObject::Find("Barrel");
  }
}

function loadCubes() {
  temp.width = 10;
  temp.height = 4;

  for (temp.y = 0; temp.y < temp.height; ++temp.y) {
    for (temp.x = 0; temp.x < temp.width; ++temp.x) {
      temp.block = GameObject::CreatePrimitive(PrimitiveType::Cube);
      temp.block.Name = "myblock";
      temp.block.transform.parent = this.empty.transform; // for deleting
      temp.block.transform.position = Vector3::Create(player.x - 5 + temp.x, player.z + temp.y, player.y + 15);
      temp.block.AddComponent(Type::RigidBody);
      temp.block.layer = this.projectile.layer;
    }
  }

  temp.nbofobjects = 20;
  temp.radius = 7f;

  for (temp.i = 0; temp.i < temp.nbofobjects; ++temp.i) {
    temp.angle = temp.i * Mathf::PI * 2 / temp.nbofobjects;
    temp.x1 = cos(temp.angle) * temp.radius;
    temp.y1 = sin(temp.angle) * temp.radius;
    this.cube = GameObject::CreatePrimitive(PrimitiveType::Cube);
    this.cube.transform.parent = this.empty.transform;
    this.cube.transform.position = Vector3::create(player.x + temp.x1, player.z, player.y + temp.y1);
    this.cube.AddComponent(Type::RigidBody);
    temp.angleDegrees = -temp.angle * Mathf::Rad2Deg;
    this.cube.transform.rotation = Quaternion::euler(0, temp.angleDegrees, 0);
  }
}
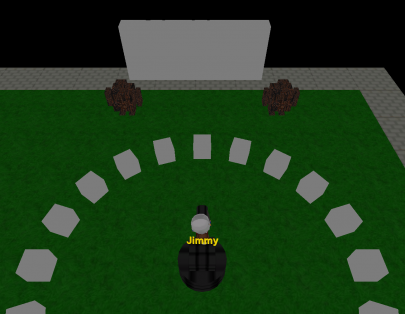
In the loadCubes() function we instantiate primitive type cubes and position them to build a wall and a circular formation around the turret.
New: Moving the Player GameObject
The player is a GameObject, and its accessed by:
| player.gameobject |
|---|
Before changing the player's transform, the player.charactercontroller must be disabled:
| player.charactercontroller.enabled = false; |
|---|
Then we can change the position accessing the transform component of the GameObject:
| player.gameobject.transform.position = Vector3::Create(player.x, player.z+5, player.y); |
|---|
New: Parenting
In Unity, parenting is when a GameObject becomes a parent of another GameObject. The child GameObject will perform all it's transform changes in respect to the parent GameObject and not the Camera. Additionally, deleting the parent GameObject will delete all its children.
We use it for the latter. We create the Empty GameObject, which will serve as a parent for the Cubes (children) in order to delete them all, since we don't have a reference to each and every cube.
New: Finding GameObjects by Name
| GameObject::Find("name") |
|---|
We use it to find the barrel that we'll move up and down and the launcher that shoots the projectiles.
Now to move the Turret;
function onKeyPressed(keycode) {
  if (keycode == "90") { // Z
    this.rotateangle -= 4;
    this.turret.transform.rotation = Quaternion::euler(0, this.rotateangle, 0);
  }

  if (keycode == "67") { // C
    this.rotateangle += 4;
    this.turret.transform.rotation = Quaternion::euler(0, this.rotateangle, 0);
  }

  if (keycode == "87") { // W
    this.rotateangleB = this.rotateangleB < 300? this.rotateangleB + 4: 300;
    this.barrel.transform.LocalRotation = Quaternion::euler(this.rotateangleB, 0, 0);
  }

  if (keycode == "83") { // S
    this.rotateangleB = this.rotateangleB > 258? this.rotateangleB - 4: 258;
    this.barrel.transform.LocalRotation = Quaternion::euler(this.rotateangleB, 0, 0);
  }

  if (keycode == "32, ,57") { // Space
    if (this.start) {
      shoot();
    }
  }
}
We rotate the barrel around the X axis for it to go up and down;
| Quaternion::euler(this.rotateangleB, 0, 0); |
|---|
And rotate the turret around the Y axis (Vertical axis);
| Quaternion::euler(0, this.rotateangle, 0); |
|---|
this.rotateangle for both cases starts at the initial rotation of the GameObjects and is incremented/decremented based on the direction of the rotation.
In the last conditional block, if space is pressed and if the Game is on (this.start == true), the projectile is shot. Here's how it's done;
function shoot() {
    SetTimer(9999);
    this.projectile = Object::Instantiate(Type::GameObject, this.projectileprefab);
    this.projectile.transform.parent = this.empty.transform;
    this.projectile.transform.position = this.launcher.transform.position;
    this.projectile.transform.scale = Vector3::Create(1,1,1);

    temp.rigidBody = this.projectile.GetComponent(Type::RigidBody);
    temp.rigidBody.velocity = this.launcher.transform.forward.Mult(this.speed);

    Quattro::EventManager::AddOnCollisionHandlerTo(this.projectile, this.projectile.layer);
    this.catcheventobject(this.projectile, "onCollisionEnter", "onProjectileCollisionEnter");
}
The projectile is initialized and positioned on the launcher.
We'll need to use physics to shoot the projectile, this is why we get the RigidBody component of the GameObject;
| temp.rigidBody = this.projectile.GetComponent(Type::RigidBody); |
|---|
(if the GameObject doesn't have a RigidBody by default, you'll need to add it using: gameobject.AddComponent(Type::RigidBody);)
We then add velocity (which is a vector that represents speed in a certain direction). The direction is the Launcher's forward direction, it is multiplied by the desired speed;
| temp.rigidBody.velocity = this.launcher.transform.forward.Mult(this.speed); |
|---|
Now to detect collision, we make sure we SetTimer(9999) for the script to stay up and looking for events, we add the Collision Handler to the projectile;
| Quattro::EventManager::AddOnCollisionHandlerTo(this.projectile, this.projectile.layer); |
|---|
and we wait for collisions;
| this.catcheventobject(this.projectile, "onCollisionEnter", "onProjectileCollisionEnter"); |
|---|
public function onProjectileCollisionEnter(gameobject, collision) {
  temp.radius = 4;
  temp.force = 5;

  player.chat = "boom=" @ collision.Gameobject.name;
  echo ("collision.Gameobject.name=" @ collision.Gameobject.name);

  temp.explosion = Object::Instantiate(Type::GameObject, this.explosion);
  temp.explosion.transform.parent = this.empty.transform;
  temp.explosion.transform.position = collision.Gameobject.transform.position;
  temp.explosion.transform.scale = Vector3::Create(1,1,1);

  temp.affected = Physics::OverlapSphere(temp.explosion.transform.position, 5);
  for (temp.col: temp.affected) {
    if (temp.col.GetComponent(Type::RigidBody) != NULL) {
      temp.col.GetComponent(Type::RigidBody).AddExplosionForce(temp.force, temp.explosion.transform.position, temp.radius, temp.force * 0.5f, ForceMode::Impulse);
    }
  }

  if (collision.Gameobject.name == "assets/jimmyminigame/robot.prefab(CLONE)") {
    this.wreckedrobot = Object::Instantiate(Type::GameObject, this.wreckedrobotprefab);
    this.wreckedrobot.transform.parent = this.empty.transform;
    this.wreckedrobot.transform.position = collision.Gameobject.transform.position;;
    Object::Destroy(collision.Gameobject);
  }

  if (collision.Gameobject.name.starts("assets/jimmyminigame/projectile.prefab")) return;

  Object::Destroy(gameobject);
}
New : Adding Explosion Force
Upon Collision, we instantiate and place the explosion. To make it seem more realistic we add an explosion force.
We first gather the Colliders around the area of explosion with a radius of 5;
| temp.affected = Physics::OverlapSphere(temp.explosion.transform.position, 5); |
|---|
this will return a list of colliders in the sphere area around the explosion.
We then make sure they have a Rigid Body component and apply explosion force to them;
| temp.col.GetComponent(Type::RigidBody).AddExplosionForce(temp.force, temp.explosion.transform.position, temp.radius, temp.force * 0.5f, ForceMode::Impulse); |
|---|
In this conditional block we ignore the collision if it is between two projectiles;
| if (collision.Gameobject.name.starts("assets/jimmyminigame/projectile.prefab")) return; |
|---|
if (collision.Gameobject.name.starts("assets/jimmyminigame/projectile.prefab")) return;
function destroy() {
  this.start = false;
  echo("destroy");
  Object::Destroy(this.turret);
  Object::Destroy(this.launcher);
  Object::Destroy(this.robot1);
  Object::Destroy(this.robot2);
  Object::Destroy(this.empty);
}
New : Destroying GameObjects
Here when the player says "dest"; this function is called and
| Object::Destroy(gameobject); |
|---|
is used to destroy the gameobject.
We can use this function with an added parameter that indicates the time in seconds to wait before destroying the GameObject;
| Object::Destroy(gameobject, seconds); |
|---|


