Getting Started Examples
In this section you will need to have both the Graal3D Client and RC downloaded. You will also need an authorized account to be able to login to the server.
- Download the build compressed file, uncompress it and run the Build application.
- Login with your GraalID and password, a window will open containing Worlds and Account info.
- Login to the erareloaded server by typing “erareloaded” in the bottom left server field and press Enter.
Once logged in, you're required to know how to use the tools that allow you to warp to different levels, debug your code... Unity tools are also available as well.
An explanation of all the tools is available here: Tools
Building a Wall Example - Creating prefabs and instantiating them
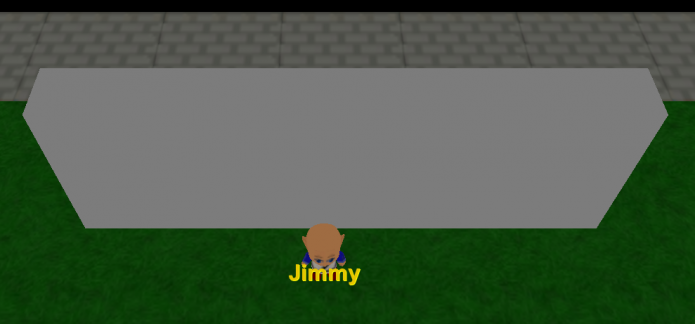
This example is found in the Unity Manual. We will build a wall using primitive type Cubes as Gameobjects. It will be demonstrated using Unity C# and on Graal3D using Graalscript.
Using Unity
Open the Unity editor with a new project.
Step1: Creating an empty Gameobject to hold our Script
To your scene add an empty Gameobject. To do that, right click in the Hierarchy Section (on the left) and click on Create Empty, place the created Gameobject in the scene in front of the camera.
This Gameobject will hold our script to build a wall.
Step2: Creating a Prefab
In the same way add a Cube Gameobject to the Hierarchy (right click in Hierarchy -> 3D Object -> Cube).
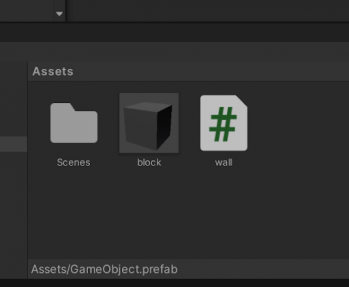
Now drag the Cube from the Hierarchy to the Assets Section to create a prefab (it will serve as a template to instantiate cubes). Rename the Cube to block (right click on the prefab -> rename).
Step3: Running the script
Now to the empty Gameobject we’ll need to add the script that builds a wall.
Press on the Gameobject in the Hierarchy, all its details will pop up in the Inspector Section (on the right). Press on Add Component and search for “script” to add a new script.
To modify the script, open it in your IDE and copy the C# script below.
Note: Make sure you name the public class the same name as your script file.
using System.Collections;
using System.Collections.Generic;
using UnityEngine;
public class wall: MonoBehaviour {
  public GameObject block;
  public int width = 10;
  public int height = 4;
  void Start(){
    for (int y = 0; y < height; ++y) {
      for (int x = 0; x < width; ++x) {
        Instantiate(block, new Vector3(x, y, 0), Quaternion.identity);
      }
    }
  }
}
Building a Wall - C# Script
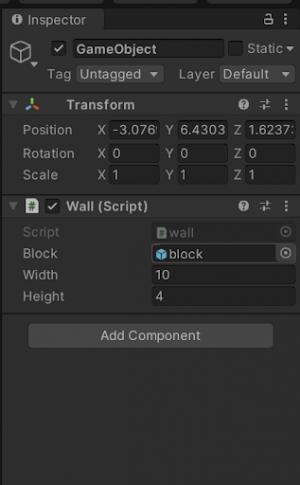
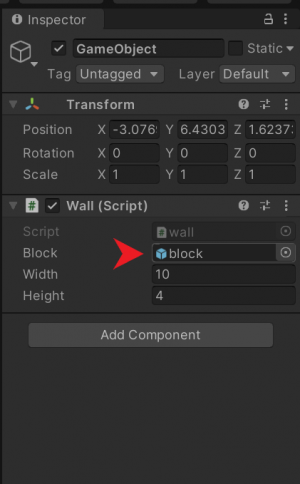
Finally, you’ll need to add the block prefab that we’ve created earlier to script component (to replace the public Gameobject variable “block” in the script).
To do that, drag it from the assets folder to the script component.
After having completed all the steps above, you should be able to start your scene, it will run all the scripts of the Gameobjects... et Voilà! A Wall!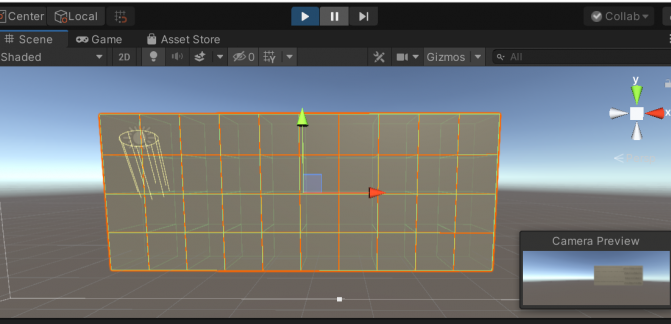
Wall with 10 Columns and 4 Rows
Explanation:
A script needs to implement a class that extends the built-in class MonoBehavior.
| public class wall: MonoBehaviour { } |
The Start function is where you instantiate your Gameobjects.
The Update function is where the gameplay updates happen (Gameobject movement, triggering actions, taking user input...). It is similar to the onTimeOut / onMouseDown / onKeyPressed... functions in graalscript.
Important Note:
Everything related to movement, direction, rotation, speed… in Unity is done using Vectors: new Vector3(x, y, z)
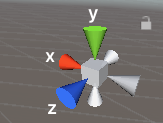
In unity the y axis represents the vertical axis (usually referred to as z)
Instantiate Function in Unity:
| Instantiate(block, new Vector3(x, y, 0), Quaternion.identity); |
Instantiate Function in Unity:
| public static Object Instantiate(Object original, Vector3 position, Quaternion rotation); |
In the example, the Object is the block and the rotation is
| Quaternion.identity |
to indicate 0 rotation.
Quaternions:
Quaternions are used to represent rotations. The most used Quaternion functions: Quaternion.LookRotation, Quaternion.Angle, Quaternion.Euler, Quaternion.Slerp, Quaternion.FromToRotation, and Quaternion.identity.
Another Way:
For primitive types there’s no need to actually create a prefab since they are recognized by Unity. We could have skipped step 2 where we create the prefab and modified our code to this:
using System.Collections;
using System.Collections.Generic;
using UnityEngine;
public class wall: MonoBehaviour {
  public int width = 10;
  public int height = 4;
  void Start() {
    for (int y = 0; y < height; ++y) {
      for (int x = 0; x < width; ++x) {
        GameObject.CreatePrimitive(PrimitiveType.Cube).transform.position = new Vector3(x, y, 0);
      }
    }
  }
}
Building a Wall - C# Script
Using Graal3D
We are going to mimic the second C# script since it would be useless to upload a Cube prefab to the server, when we can simply instantiate them using PrimitiveType.
The same script above will look like this in GraalScript:
findplayer("GraalID").addweapon(this.name);
//#CLIENTSIDE
function onCreated() {
  this.width = 10;
  this.height = 4;
  for (temp.y = 0; temp.y < this.height; ++temp.y) {
    for (temp.x = 0; temp.x < this.width; ++temp.x) {
      GameObject::CreatePrimitive(PrimitiveType::Cube).transform.position = Vector3::create(player.x - 5 + temp.x, temp.y, player.y + 1);
    }
  }
}
Building a Wall - Graal Script
The two codes are almost the same except for:
- The onCreated() function replaces the start() function
- The “ . ” for methods is replaced by “:: ”
Function format: Unity C#: Type.method => Graal Script: Type::Method
- Vector3::Create(x,y,z) replaces new Vector3(x,y,z)
- The Gameobject is instantiated close to the player using (player.x and player.y)
Wall with 10 Columns and 4 Rows
Circle Formation Example - Using Rotation and Mathf functions
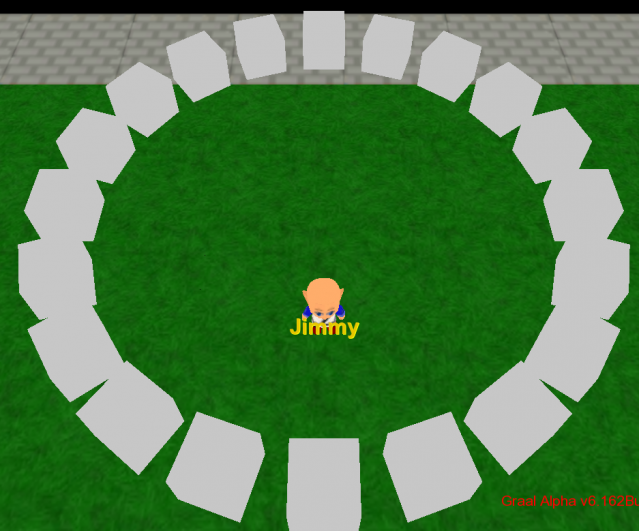
This example is similar to the one above, we’ll instantiate the Cubes in a circular shape with rotation so that they all point towards the player.
Using Unity
Just like in the previous example; create a new script file named “CircleFormation”, open it in you editor and copy paste this code:
using UnityEngine;
public class CircleFormation: MonoBehaviour {
  public GameObject prefab;
  public int numberOfObjects = 20;
  public float radius = 5f;
  void Start() {
    for (int i = 0; i < numberOfObjects; i++) {
      float angle = i * Mathf.PI * 2 / numberOfObjects;
      float x = Mathf.Cos(angle) * radius;
      float z = Mathf.Sin(angle) * radius;
      Vector3 pos = transform.position + new Vector3(x, 0, z);
      float angleDegrees = -angle*Mathf.Rad2Deg;
      Quaternion rot = Quaternion.Euler(0, angleDegrees, 0);
      Instantiate(prefab, pos, rot);
    }
  }
}
Circle Formation - C# Script
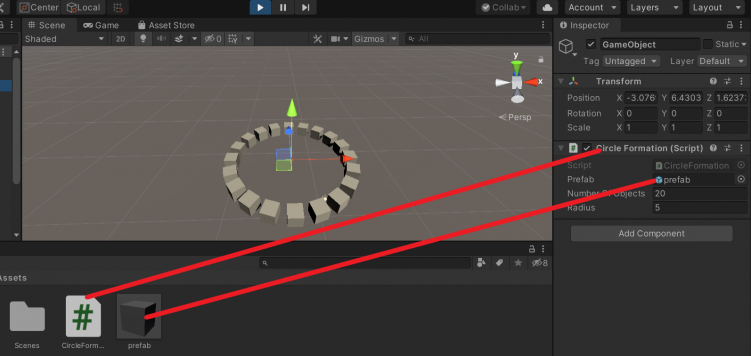
Create an empty Gameobject in the Hierarchy, add the script to it (as a component).
Add a Cube Gameobject to the Hierarchy (right click -> 3D Object -> Cube).
Now drag the Cube from the Hierarchy to the Assets Section to create a prefab, rename it to “prefab” to be referenced by the script. Finally add it to the script on the Empty Gameobject and hit run.
Explanation:
In this example we use the Mathf collection, a struct containing all the static math methods.
https://docs.unity3d.com/ScriptReference/Mathf.html for all the methods.
We also use the Quaternion.Euler to rotate the cubes. You can rotate around whatever axis you want, in our example Quaternion.Euler(0, angleDegress, 0) rotates the cubes around the y axis.
Another Way:
Just like before we could’ve just used GameObject.CreatePrimitive(PrimitiveType.Cube) to create the cubes and then change the transform.position and the transform.rotation.
Using Graal3D
Again, since we don’t want to upload useless PrimitiveType prefabs to the server, we use this approach:
findplayer("GraalID").addweapon(this.name);
function onCreated() {
  temp.nbofobjects = 20;
  temp.radius = 5f;
  for (temp.i = 0; temp.i < temp.nbofobjects; ++temp.i) {
    temp.angle = temp.i * Mathf::PI * 2 / temp.nbofobjects;
    temp.x1 = cos(temp.angle) * temp.radius;
    temp.y1 = sin(temp.angle) * temp.radius;
    temp.cube = GameObject::CreatePrimitive(PrimitiveType::Cube);
    temp.cube.transform.position = Vector3::create(player.x + temp.x1, player.z, player.y + temp.y1);
    temp.angleDegrees = -temp.angle * Mathf::Rad2Deg;
    temp.cube.transform.rotation = Quaternion::euler(0, temp.angleDegrees, 0);
  }
}
Circle Formation - Graal Script
Moving Cube Example - Using the Update function
Using Unity
using System.Collections;
using System.Collections.Generic;
using UnityEngine;
public class MovingCube: MonoBehaviour {
  GameObject cube;
  public int height = 10;
  public float yCenter = 0f;
  void Start() {
    cube = GameObject.CreatePrimitive(PrimitiveType.Cube);
    cube.transform.position = new Vector3(0, 0f, 0);
  }
  void Update() {
    cube.transform.position = new Vector3(cube.transform.position.x, yCenter + Mathf.PingPong(Time.time * 2, height) - height / 2f,       cube.transform.position.z);
  }
}
Moving Cube - C# Script
Here we use the Update function. As its name suggests, it will serve to update gameplay and move the cube up and down depending on the time.
Using Graal3D
findplayer("GraalID").addweapon(this.name);
//#CLIENTSIDE
function onCreated(){
  this.cube = GameObject::CreatePrimitive(PrimitiveType::Cube);
  this.cube.transform.position = Vector3::create(player.x,player.z,player.y);
  this.height = 10;//max height of Box's movement
  this.yCenter = 0.0;
  SetTimer(0.001);
}

function onTimeout() {
  this.cube.transform.position = Vector3::create(this.cube.transform.position.x,this.yCenter + Mathf::PingPong(Time::time *2,    this.height)  - height / 2.0,this.cube.transform.position.z);
  SetTimer(0.001);
}
Moving Cube - GraalScript
Here the SetTimer() and onTimeout() functions replace the Update() function in Unity.
Cube with Physics - Using Physics and Collision
In this example we will add physics to our Gameobject, it will be subject to gravity, forces and collisions with other Gameobjects. We will also see how to detect and handle these collisions.
findplayer("GraalID").addweapon(this.name);
//#CLIENTSIDE
function onCreated() {
  SetTimer(9999);
  this.cube = GameObject::CreatePrimitive(PrimitiveType::Cube);
  this.cube.transform.position = Vector3::create(player.x + 5, player.z, player.y);
  this.cube.AddComponent(Type::RigidBody);
  Quattro::EventManager::AddOnCollisionHandlerTo(this.cube, this.cube.layer);
  this.catcheventobject(this.cube, "onCollisionEnter", "onCubeCollisionEnter");
}

public function onCubeCollisionEnter(gameobject, collision) {
  player.chat = "Collision!";
}
Cube with Physics - Graal Script
We create and place a Cube just like the examples before. To add physics to the Gameobject, we add the RigidBody Component.
The Quattro::EventManager::AddOnCollisionHandlerTo() function will a collision handler.
And this.catcheventobject(GameObject, “onCollisionEnter”, “”)
The onCubeCollisionEnter(gameobject, collision) will trigger functionalities upon collision.
Note: Whenever we use collisions, the SetTimer(9999) is essential, it will keep the script alive and always checking for events.
